|
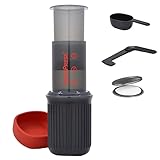
A Nespresso coffee maker is a must-have for any coffee enthusiast, as it produces an easy single-cup brew without you having to measure the grounds-to-water proportion. This type of coffee maker automatically adjusts your brew’s ratio, intensity, and temperature. However, owing to regular use, it may develop mineral stains and grime over time. In this post, we’ll outline two methods for thoroughly cleaning your Nespresso, so you can enjoy your favorite coffee capsules without worrying about the gritty texture or mold odors from mineral buildup. Wondering how to clean Nespresso machine? Read on to find out. Should You Clean Your Nespresso Machine and Why it is ImportantA clean Nespresso machine produces the best espresso possible. Coffee has a lovely aroma and flavor, but if you don’t regularly clean your machine, this could change for the worst and add an odd or unpleasant taste. When you make your lungo, espresso, and latte macchiato drinks, coffee and oil residues will pile up in your machine’s system, affecting the coffee taste/machine function. Even worse, if limescale accumulates, it may block the water flow to the point where your coffee machine stops working entirely. Nespresso advises routine cleaning to keep the machine in good shape. Routine maintenance will provide the best-tasting coffee. Additionally, you’ll increase the lifespan too. How do I clean my Nespresso machine? Step by Step InstructionsCleaning your machine is the best way to keep bacteria and mold at bay. Here’s how to clean your Nespresso machine quickly and easily: Rinse and Clean the Water TankStart by taking out the water tank. Place it into the sink. Wash it with dish soap and thoroughly clean it before filling the tank with fresh water. Dry your water tank using a fresh cloth, or let it air dry. This will prevent the growth of bacteria or mold, which thrive in moist areas. After that, reattach the clean tank to the machine. Wipe the Capsule Container With a Clean ClothFirst, remove the Nespresso capsule from the coffee maker by lifting the lid. Next, take out the container and hand wash it with dish soap and water. Leave the capsule container to dry and search inside the machine for the capsule detector lens. Gently wipe the lens clean with a soft cloth. Avoid using water or soap. The idea is to clean any smudges from the lens. After cleaning it, put it back in its original position. Clean the Drip TrayEmpty and clean the drip tray with dish soap. Rub out any residue. Return the drip tray to its original location. To avoid overflow, empty the drip tray daily. Clean up the External PartsFrequently wipe the machine’s coffee outlet and exterior cover. The part where the coffee pours into your cup is called the coffee outlet. Wipe away any residue with the cloth. Clean the inside walls and outer edges around the capsule holder. We recommend repeating this multiple times each week. Run a Rinse CycleTo clean the inside of your machine, you’ll need to run a quick cleaning process. Add some water into the water tank and heat your machine. Wait for the light to stop blinking. Place a container large enough to hold 4 cups of water on the cup tray once the light stops blinking and is steady. Start the cleaning procedure by pressing the machine’s button three times quickly within two seconds. This can take some time as the cleaning process will run until the water tank is empty. Now, reassemble all the parts. What’s the Difference Between Cleaning and Descaling?
Cleaning makes coffee taste better by removing coffee oil residue. The descaling procedure effectively removes the mineral scale from the heating element, increasing the life of the device. Descaling is a chemical method of removing limescale buildup. Limescale is a chalky coating that can clog a coffee maker. Since over 99% of a cup of coffee is water, it’s among the essential ingredients in brewing good coffee. All water contains magnesium and calcium minerals, which travel through your coffee maker and finally build as limescale on the heating element. Months of mineral accumulation might exist in a machine without you being aware, since the heating elements can’t be seen. Cleaning your coffee machine removes accumulated coffee oil residue over time. Both descaling and cleaning processes are critical for producing safe, flavorful coffee. How to Descale a Nespresso Machine?Descaling your machine is not the same as simply running it through a cleaning cycle. Let’s see how to descale your Nespresso machine. Read the InstructionsBefore starting the descaling procedure, carefully read the directions for the descaling liquid, and make a note of any important details. Ensure that your descaling liquid is non-toxic and food-safe. Descaling solutions for models may differ, so ensure you get the right one. Prepare the MachineDetach the appliance and thoroughly clean it. Turn the device on and wait for it to reach the proper temperature before unlocking it. Pull the lever to release the capsules from the capsule container. Remove the top, capsule container, and drip tray and place a 1-liter container beneath the coffee outlet. Now, add your preferred descaling solution and around half a liter of water to the water reservoir. This can help you remove any limescale or grime and make the descaling process more successful. Set the Coffee Maker to Descale ModeSetting your Nespresso in Descaling Mode is a breeze. However, the method you use will differ depending on the model you have. Make sure to read the manual. If it’s a Vertuo model, you’ll need to press and hold just one button for seven seconds. Suppose you have a different model, such as an Inissia, Citiz, or Pixie. Take into consideration that you must press two flashing buttons simultaneously for three seconds (this timing is a baseline, some models require more). Run a Descaling CycleStart a descaling cycle by pressing the flashing button(s), then watch as water is pumped through the appliance. This may take some time, so wait till the tank is empty. Nespresso advises repeating the process with the solution after the water runs through. Run water through the system multiple times to ensure every bit of the descaling fluid has been rinsed away. If not, the first brew you make can taste strange. When completed, empty the used water container and replace it under the spout. Exit the Descaling ModeAfter thoroughly cleaning the machine, stop the descaling mode by hitting the appropriate buttons. The device will beep to notify you of this. Dump the water collected after descaling down the sink and rinse your machine. Give your machine at least ten minutes to dry. After that, fill the water tank with fresh water. Now you’re all set to brew a fresh cup of coffee. Top Tips for Maintaining Your Nespresso MachineRegular and effective maintenance can greatly simplify your cleaning routine. Here are a few tips to make cleaning easier and increase the life of your machine. Use Filtered WaterThe quality of water should meet the brand’s quality. We advise using filtered water to prevent limescale formation in your Machine. Limescale forms when you utilize unfiltered hard water. Regularly Clean Your MachineYou must clean the Nespresso machine daily, starting with a moist, clean rag to remove debris and stains that could block the device. You can also use an espresso machine cleaner as directed by the manufacturer for this process. Descale Your MachineYour machine should be descaled every three months. If you brew a lot of coffee, descale it after 300 capsules. Some models have a machine light that flashes when descaling is required. Soak Removable PartsIf you’ve used your coffee maker at least once this week, it’s a good idea to save some time on a less busy day to soak and wash all the removable parts of the machine. You may do a deeper clean and focus on your machine’s most difficult-to-reach crevices. Combine hot water and Nespresso machine detergent. Remove Coffee Grounds QuicklyAfter brewing your coffee, remove the used coffee grounds from the portafilter or the device. If you leave them in for an extended period, the natural oils or coffee grounds may stick to the parts, making it difficult to clean your machine. Even worse, the machine’s oils may become rancid or sour, leaving you with poor espresso. EndnoteLearning how to clean a Nespresso machine is as simple as tapping a few buttons, so if this is a task you’ve been putting off, don’t worry — there’s no reason to wait any longer. The descaling process for this type of coffee maker is really simple, and as long as you follow the methods stated above, it shouldn’t take you very long. You might like these models: Breville VertuoPlus Nespresso Coffee Machine – Espresso Maker The post How to Clean Nespresso Machine – Step by Step Guide appeared first on Great Coffee Brewers. from https://greatcoffeebrewers.com/how-to-clean-nespresso-machine/
0 Comments
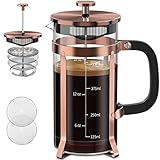
This article will explain the differences between AeroPress vs French Press, and help you determine which is best for you. The AeroPress and the French Press are two of the most widely used manual coffee makers on the market. Despite its name, the French Press was invented in 1929 by an Italian named Attilio Calimani and is still commonly used more than 85 years later. The AeroPress, in contrast, is relatively new compared to the French Press. Alan Adler, president of Aerobie, invented it in 2006. Although they both have the word “press” in their names, they operate much differently. They produce coffee with various qualities, thrive in different conditions, and fit different lifestyles. AeroPress vs French Press Differences
Prices pulled from the Amazon Product Advertising API on:
Let’s look at the list we’ve compiled here today to learn more about the other significant differences between the AeroPress and French Press, in terms of capacity, usability, durability, and other factors. How They WorkComparing the design elements of the French Press and AeroPress is like comparing apples and oranges. They’re both “fruit” (or, more accurately, coffee makers), but they’re not even close to the same. AeroPress coffee makers feature an airtight seal that adds pressure to the brewing chamber. This air pressure pushes the coffee and hot water mixture through a thin paper filter, producing a fresh cup of coffee. A French Press also needs pressure. You press the plunger to build up air pressure in the brewing chamber. This pushes the coffee and hot water mixture through a metal mesh filter to make the coffee. Brewing coffee with any method requires pressure, but an AeroPress paper filter allows for additional pressure, resulting in a smoother coffee.
Convenient and FastMany coffee drinkers like to brew coffee fast and easy, and fortunately, both AeroPress and French Press are easy to use. Brewing coffee with AeroPress is a breeze. The filter is near the cylinder and functions almost like a squeegee that removes oil from the sides. At the base of the cylinder, the grounds condense into a tidy little “puck” that may be knocked free and thrown away. Another key selling point for AeroPress is how easy it is to clean. Since the coffee grounds end up in the cap, crushed into a small puck, you can unscrew the lid and rinse the rest of the device. Easy to UseThe process of using a French Press is easy too. You pour water over coarsely ground coffee, let it steep for a few minutes, and then press the plunger to push the stainless steel mesh filter down. However, cleaning a French Press is a complex task. When using a French Press, the coffee grounds are tightly compacted into the bottom of a glass cylinder. If you plan to compost them, you must dig them out before you can start cleaning the vessel, which would be considered inconvenient. Brewing SpeedThe AeroPress has one benefit over the usual French Press, as the brew is ready in just one to two minutes with a French Press. High pressure lets the water capture the flavor from the finely ground coffee considerably faster than an espresso maker or drip coffee maker, making it one of the quickest coffee brewing processes available. On the other hand, a French Press needs three to five minutes. The coffee grounds remain in the water for longer before being extracted by the metal mesh filter, giving you a stronger cup of coffee. AeroPress is generally preferable if you need anything quickly. This is true as long as you need a single cup and are not a huge fan of coffee bean oil in your coffee. A French Press is preferable when you’re not in a rush, need to make more coffee, or want a stronger flavor. Coffee Flavor and QualityNow comes the good stuff: the coffee itself. Both the French Press and the AeroPress can produce excellent coffee that is full-flavored, well-balanced, and utterly delightful. However, there are some subtle flavor variations that you should be aware of. First, the French Press’s metal filter often produces coffee with a rich body and full flavor. The mesh filter doesn’t stop microscopic coffee grounds and natural oils, which gives the coffee a touch of fullness and heaviness and enhances the taste. These factors limit specific flavor clarity while producing a more robust, well-rounded flavor. Given its paper filtering system, which prevents oils and small particles from entering the brewed coffee, the AeroPress improves flavor clarity. AeroPress creates a lighter-bodied, sediment-free cup that brings out the vibrant and fruity flavors of whatever coffee bean you use. The coffee is often smoother and more fragrant than French Press coffee. These are both flavorful coffee alternatives, but AeroPress is the way to go if you enjoy a smooth, clean cup of coffee. A French Press is best if you prefer strong and hot coffee. Coffee Grind SizeThe key to making the best coffee is choosing the right beans or, more specifically, choosing the appropriate grind size for the brewing method. There are several options available in the coffee market, and both French Press and AeroPress coffee makers use different grinds. AeroPress produces a fine grind, with few coffee grounds when used as intended. Even though the brewing process takes less time, there’s still a lot of pressure involved, and smaller coffee bean grinds allow the hot water to pick up the taste more effectively. It has the potential for a smoother flavor and needs less time to steep than the French Press. The French Press typically requires a relatively coarse grind because of filter design; the metal mesh usually calls for a coarse grind. Because of the coarse grind, the French Press takes longer to steep, which can be useful for multi-taskers but unfavorable for those in a hurry. Brewing CapacityWhen brewing coffee and choosing the best brew methods, you need to consider who you’re preparing coffee for – and this is the biggest difference between French Press vs AeroPress coffee. The AeroPress is a single-cup coffee maker, and the cup is relatively small. AeroPress is made to hold 6 to 8 ounces of coffee, making them essentially single-serve coffee makers. Therefore, they work well for single people and college students who only need a quick cup but not so well for households of coffee lovers. That may be all you need to know to change your mind and choose the French Press. The majority of French Presses can produce 1 to 8 cups of coffee. You can use a small French press to make a single cup or a larger one to make several cups at once. With a French Press, you may brew for a dinner party or the entire household. If that’s what you’re looking for, the French press is the way to go.
Design And DurabilityThe French Press consists of a narrow cylindrical beaker made of transparent plastic or glass with a lid made of plastic or metal, a stainless steel wire filter, a plunger that securely fits the cylinder, and a suitable nylon mesh filter. If you purchase a high-quality French Press and use it frequently, the screen will last at least a year without facing any troubles. A cheap French Press should last anywhere between six months and a year. If you want to bring your press with you on your adventures, the French Press may not be ideal because it breaks down easily. On the other hand, the AeroPress uses a food-safe rubber designed with fewer parts and is exceptionally durable under pressure. It has a hard plastic chamber that can withstand heat. A plunger that fits into the room’s top makes an airtight closure. It’s a strong, dependable brewer you can use whenever and wherever. Overall, an AeroPress brewer is an excellent investment because, with good care, it will last you for two to three years. Which is Better, AeroPress vs French Press?The French Press and AeroPress are the market’s most well-liked manual brewing tools. They promise a freshly brewed cup of coffee whenever you need one. The AeroPress is the best option for anyone looking to brew espresso-like coffee using pressure quickly, easily, and electricity-free. AeroPress machines are frequently smaller and more portable, making them an excellent alternative for brewing coffee on the go. It’s a matter of personal preference as to the maker and type of coffee you prefer. But the good news is that you can have both of them for a reasonable price and drink great coffee right away! When it comes to the battle of AeroPress vs French Press, we say, do the research and pick the product appropriate for your situation. In our case, we’d rather have the AeroPress, which offers convenience, speed, and quality.
Prices pulled from the Amazon Product Advertising API on:
The Aeropress vs Pour Over Coffee Maker Debate French Press vs Drip Coffee: The Aficionado’s Take Aerobie Aeropress Coffee Maker Instructions, Review, Video The post AeroPress vs French Press: Which Coffee Maker is Better appeared first on Great Coffee Brewers. from https://greatcoffeebrewers.com/aeropress-vs-french-press/ Coffee has an innate bitter taste, and that’s something many coffee drinkers appreciate. But what if you want your coffee creamy and sweet? Is it even possible to get rid of these bitter undertones? While bitterness in coffee is a common trait, it’s certainly avoidable. Today, we’ll share a quick guide on why is coffee bitter and a few easy hacks to fix it — if at all you want to fix it. Looking for a cup of freshly homemade sweet coffee? Read on. Why Is Coffee Bitter?
Before we get to the hacks for fixing the bitterness in your coffee, let’s first understand what causes it: 1. You Are Over Steeping Your CoffeeSteeping is a standard coffee-making method where you put the coffee grinds directly in the water instead of passing it through a filter first. This is a common mechanism used in equipment like the French Press or an AeroPress. Now the problem with this method is that a lot of beginners don’t know how long the coffee should be steeped. If you leave it in the water too long, too much of the coffee flavor will be extracted, which will drastically increase the bitterness. On the other hand, if you don’t steep it long enough, the coffee will come out tasteless and weak. The trick is to find the perfect brew time, which only comes with practice. If you would rather have weak coffee than bitterness, start with a shorter steeping period and slowly work your way up until you find the perfect steep duration. 2. You Are Using the Wrong Brewing & Grinding MethodBrewing the perfect cup of coffee involves a few more steps than what might appear at first glance. For starters, you need to know what kind of grinds you are using to find the perfect brewing method, which in turn will help you balance the bitterness. Here is an example. If you are using coarse grinds, a simple French Press will do, but if you are using fine coffee grinds, you will need a Steam espresso machine or a coffee maker with cone-shaped filters. This is because fine coffee grinds, being smaller in size, impart more flavor and bitterness. On the other hand, coarse grinds, with their large surface area, require more steeping and are known to produce sweeter, lighter coffees. Understanding the requirements of your coffee grinds will help you pick the correct brewing method that extracts just the perfect amount of flavor. 3. Stale Coffee BeansSometimes, there’s no one to blame — neither your coffee-making skills nor the quality of your beans. Maybe you were simply too late to use the latter. It’s no secret that no matter where coffee beans come from, they don’t stay fresh forever. With time, the tantalizing flavors fade and are replaced by unflattering bitter tones. No matter what roast you use, the peak flavors usually fade away within a few days. If you want the best flavors without bitterness, try using the grinds within a week or two. 4. Unstable Water TemperatureThe perfect cup of coffee requires two main ingredients — ground coffee and water. But people often forget about the contribution of the latter in the taste of the final cup. For starters, make sure whatever water you use does not have its own funky taste. Unfiltered water is a bad choice, as is distilled water that lacks essential mineral content. Regular filter or bottled spring water without any distinguishable taste is your best bet. Also, the perfect coffee water temperature lies between 195 F and 205 F. Hot water indeed extracts more flavors, but it also makes your coffee bitter. Cold water, on the other hand, might not make your coffee bitter, but with restricted extraction, it will certainly make your coffee bland. The trick is to never go extreme with the temperature. Stay within the above-mentioned range, and you will be good to go. 5. You Are Using the Wrong RoastYou think you are doing everything right, but the coffee is still bitter — maybe the problem lies in your coffee beans. The flavors your coffee beans can impart, including the bitterness, largely depend on its roast. Yes, the roast does not just affect the color of your coffee but also its taste. By a general rule of thumb, dark-roasted coffee beans always taste bitter compared to medium roasts, whereas light-roasted beans are known for their light and sweet flavors. When it comes to coffee, the only thing that matters is whether you like it or not. Whatever beans you like are the best in the world. Manufacturers usually label their beans to distinguish between different roast levels. If you come across fancy terms like French, Espresso, Viennese or Italian on the packet, run! They all refer to dark roasts. 6. The Problem Is in the SpeciesThere are two major coffee species in the world — Robusta and Arabica. If you see that your coffee keeps tasting bitter no matter what you do, maybe you have picked a bag of Robusta beans, which are known for their extreme bitter taste (especially compared to Arabica) and high caffeine content. Robusta beans grow faster and are pretty easy to harvest, considering their natural immunity against pests, which in turn, makes them cheaper. That’s why beginners are often drawn to them. Arabica beans, on the other hand, are less bitter and more flavorful. But since they need a lot of care and attention to grow, their cost is quite high. If you are craving a nice cup of light coffee, Arabica beans are your best friend. Considering almost all premium coffee brands use Arabica beans and label them on the pack, they shouldn’t be too hard to find. 4 Ways to Fix Your Bitter Coffee
The easiest way to fix your bitter coffee is to add sugar. But if you are looking for other hacks that do not involve piling loads of white sugar, we have a few ideas for you. 1. Choose Naturally Sweeter BeansThe easiest way to make your coffee taste less bitter is to use naturally sweeter beans. The only thing you can really do is look for one from the Arabica species with a light to medium roast. Also, for the best flavors and the least bitterness, make sure it’s roasted freshly. If you manage to find a batch of coffee beans checking off all these three criteria, you never have to worry about bitterness again. 2. Switch to Cold BrewIf despite all your efforts, your coffee turns bitter every single day, maybe you need a little more time to get the hang of it. After all, finding the right temperature and duration of extraction isn’t as easy as it sounds. So until then, you can switch to a cold brew. With this, you won’t run the risk of over-extracting the bitter flavors at high temperatures. The cold brew might take longer to extract the flavors, but it’s better to go slow than rush into a bitter coffee. 3. Clean Your Equipment Thoroughly After Every UseWhile this is an essential kitchen tip for almost all coffee makers, in the case of coffee, it has more to do with flavor than hygiene. Let’s assume you make a batch of coffee, but while cleaning out the coffee maker, you leave behind a patch of extracted coffee grinds. Now, the next time you make coffee, you will have a stale batch of coffee grinds that are already extracted, infiltrating the fresh batch of coffee grinds. Grinds already extracted once will have no flavor left to impart other than the bitter notes, which will ultimately give your coffee that resentful bitter taste even if you use the proper process with fresh beans. 4. Use an Artificial SweetenerWe have already talked about a few ways to ensure your coffee doesn’t turn out bitter, but what if it does? You surely don’t want to throw away an intact cup of coffee and go through the trouble of making another one. In that case, artificial sweeteners are your last resort. There are plenty of other ingredients and commercial artificial sweeteners made out of Aspartame and Saccharin. If you are looking for something just as sweet as white sugar but with almost zero calories, look for a sucralose-based sweetener. Bottom LineWhy is coffee bitter? Bitterness is an inherent trait of coffee, but that doesn’t mean you have to put up with it even if it interferes with your personal coffee preferences. The final flavor of your coffee depends on the very first step you take. Starting from the beans you select to the way you make them, everything affects the bitterness of coffee. But with this quick guide, you will be able to avoid all the rookie mistakes that bring out its innate bitter compounds. You can now enjoy a cup of sweet and foamy coffee every morning! The post Why Is Coffee Bitter: Reasons & Solutions appeared first on Great Coffee Brewers. from https://greatcoffeebrewers.com/why-is-coffee-bitter/ Tired of your old, dirty grinder screen ruining your morning coffee? It’s time for a deep cleaning session. Coffee grinders will keep collecting residue from your grinding sessions, which can later interfere with the taste and quality of your new batch. Today, we’ll share six easy ways to clean your grinder screen until it’s sparkling clean and smells pleasant. How to Clean a Grinder Screen
Here are some easy ways that explain how to clean a grinder screen: 1. Freezer MethodThis is probably one of the easiest ways to clean your grinder screen. For this method, you need to put the entire grinder inside your freezer. After about 15 to 20 minutes, all the wet remnants will dry up and freeze, making them contract. As the debris reduces in size, it will be much easier to get them out with a little shake. Remember, the efficiency of this method also depends on how dirty your grinder screen is to begin with. If it’s too dirty, you might still have some coffee bean residue stuck inside. In that case, try this next trick. 2. Soak the Grinder in an Alcohol or Hot Water SolutionIf you’re trying to loosen up greedy coffee remnants from the grinder, try soaking it for a few hours in rubbing alcohol (isopropyl alcohol) or warm water. After 20-30 minutes, when the grime has softened up, use a stiff brush to scrub off the residue. After using the alcohol, rinse the grinder once again and leave it out in the sun for a few hours to get the smell of alcohol completely off the grinder screen. This method should clean your grinder screen — almost making it look like it’s brand new. If your grinder screen is extremely dirty and hasn’t been cleaned in a while, you can combine the two methods to get a better result. Start with the freezing method to get most of the residue out, followed by the alcohol method to remove the toughest of leftovers. NOTE: This method only works for stainless steel and metal grinders. Don’t use it on plastic grinders. 3. Baking SodaBaking soda is a fantastic and popular cleaning agent that is particularly effective when it comes to the greedy stains of a coffee grinder screen. Baking soda is alkaline in nature, meaning it reacts with the dirt and grease of your coffee grinder and easily dissolves it. All you have to do is disassemble the grinder and coat it well with a thick paste of baking soda and water. Leave it on for a few hours to give it enough time to dissolve the dirt and wash it off with clean water. Next, use a dry cloth to wipe and clean any baking soda residue. 4. Plain RiceCoffee residue and dirt aren’t the only things you might need to remove from your old grinder. Sometimes, your grinder might look clean at a glance, yet your coffee grounds could end up clumping anyways. If this is the case, your grinder needs to be cleaned of coffee oil remnants. For this, you will need about ¼ cup of plain white rice. Pour your rice into the grinder and turn it on. As it pulverizes the rice and grinds it into fine dust, the rice will absorb the coffee oil from the blades. Rice is hygroscopic in nature, meaning that anytime it’s exposed to something with higher moisture content, it’ll automatically absorb the moisture. If you don’t have white rice available at the moment, or you simply don’t want to waste food, you can use stale bread too. You just need to cut the bread into small pieces, put them into the grinder and turn it on. After a few rounds, dump the bread crumbs and wipe the interiors with a damp cloth. 5. White VinegarIf the biggest issue with your coffee grinder is smell, try white vinegar. Vinegar is rich in acetic acid, which is known to neutralize alkaline odors. For this method, grab a paper towel and dip one end in white vinegar or distilled vinegar. Next, wipe your entire grinder screen with the paper towel and leave it out in the sun for a while to get rid of the vinegar smell. If you’re not a fan of white vinegar, try washing the grinder with water and dish soap after the vinegar wipe to get rid of the smell faster. PRO TIP: If you’re more focused on removing the smell than the debris stuck on the blade, you can also try sugar or salt. They work just as well as white vinegar — without the lingering smell. They’re also much easier to dump after cleaning. 6. Coffee Grinder Cleaning TabletsNot a fan of messy and tedious DIY solutions? Try a coffee grinder cleaning tablet. They look just like regular tablets and are usually odorless. You put them in your grinder and turn them on at moderate speed. Just like rice, the grinder will pulverize the tablets, which will then soak up the smell, moisture, oiliness, and dirt from the grinder. After a few rounds, dump the contents of the grinder and rinse it with soapy water. Why Do You Need a Clean Grinder?
Wondering why you should put any effort into cleaning your grinder when a dirty grinder works just fine? Let us tell you how a clean grinder will benefit you: 1. Better GrindingGrinders use blades to slice up coffee beans repeatedly until they’re finely ground. The cleaner you keep it, the sharper the blades will be. Imagine this: if your grinder blades are already laced with old coffee grounds, they won’t be able to come into direct contact with new coffee beans. 2. No ContaminationDo you want your fresh coffee beans to grind against stale residue from your previous batch? Keeping the grinder clean ensures that your coffee grounds are pure and flavorful. In addition to that, coffee residue, when allowed to accumulate over a long period, can turn into an active site for yeast and bacterial growth, making this match with coffee completely unfit for drinking. 3. No ClumpingClumping is one of the most common problems you might face while grounding your coffee at home. Old coffee grounds will turn hard and sticky after a time. When they come in contact with fresh coffee beans, they’ll mingle and stick to them, disrupting the entire cleaning process and possibly even ruining the whole batch of beans. 4. Increases LongevityAt the end of the day, the biggest reason for maintaining kitchen appliances is to extend their service life. A good grinder should last at least 3 to 4 years. However, if you are constantly forcing it to work harder and with dirty blades, it’ll not only take up more energy, but also slowly wear down over time from the excess mechanical stress and heat. Frequently Asked Questions1. Do you need to clean your grinder screen?Of course, cleaning your grinder screen is absolutely uncompromisable. Give it a quick rinse on a regular basis and a deep cleaning every 2 to 4 uses, depending on how dirty it is. This will not only keep your coffee hygienic, but also work better and faster while keeping the taste of your coffee intact. 2. When is it time to get a new grinder?There’s no hard and fast rule on how frequently you need to change your grinder. It all depends on the quality of the product, how often you use it, and how well you maintain it. Some grinders last for only 6 months, while some make it for 2-3 years. Instead of changing them out at fixed intervals, look for signs of damage and inefficiency before making a call to buy a new grinder. 3. Why is my grinder clumping the coffee?If you’re struggling with clumpy coffee powder, your sticky grinder might not be the only one to blame. In most cases, it’s excess moisture and humidity. Try cleaning your grinder screen and drying it before you put in the beans. Also, ensure that you store the beans properly in a cold and dry place. If these don’t work, you can also try installing a dehumidifier in your kitchen. 4. Can you grind coffee in a blender?Yes, you can grind coffee in a blender. After all, a blender is a lot like a grinder — with the same working principles, container and blades. However, the size and shape of a blender’s blade are quite different from a grinder, so one can’t guarantee how fine the coffee will be. Bottom LineNow you should know exactly how to clean a grinder screen. Coffee enthusiasts cannot start their day without a fresh cup of coffee. Now, do you want your mornings to be troubled by a malfunctioning grinder? Surely not! To keep away complications, cleaning your grinder screen is a must. And when cleaning your grinder screen is this easy, you don’t need any more excuses for stalling. Get those gloves on, grab our guide, and get started cleaning your grinder the right way!!! The post How to Clean a Grinder Screen: 6 Tips to Use Now! appeared first on Great Coffee Brewers. from https://greatcoffeebrewers.com/how-to-clean-a-grinder-screen/ Just the aroma of a fresh cup of coffee is enough to get coffee lovers out of bed. After all, you definitely don’t want to start your day without a caffeine boost. But did you know that the storage conditions of your coffee are just as important as the type of beans? A lot of coffee lovers often wonder if freezing ground coffee is the right way to store it. If you are not sure, this guide is for you. Let’s find out if you can freeze coffee grounds, and if not, what the proper way to store them is. How to Store Coffee Grounds ProperlyMany people don’t know how to store coffee grounds properly to preserve their flavor. Thus, they often get used to having coffee that loses its deep original flavor. Coffee grounds that are stored improperly become lumpy and lose their flavor. A little bit of knowledge about the storage of ground coffee or fresh beans can help you enjoy your morning and evening coffee a little more. Factors Affecting Ground Coffee Storage
Here are a few factors you need to keep in mind while storing ground coffee: 1. MoistureThe major factor that leads to coffee grounds getting stale and lumpy is moisture. Though there’s no universal method for storing coffee grounds, it’s recommended to keep the coffee grounds in an air-tight container. Continued exposure to moisture can increase the humidity levels, which in turn results in the growth of mold. A good cup of coffee needs to be balanced in acidity and aromatic. Higher moisture levels don’t give you that. The lumpiness is not necessarily a sign of spoiled coffee, but it does alter the flavor to some extent. However, it’s possible to get the moisture out of the coffee grounds by tossing them under the sun and then storing them again properly. 2. SunlightThe degradation of agricultural products like coffee grounds is only normal over time. However, certain factors speed up the process. One such factor is light. Long periods of sunlight exposure cause photodegradation, which is the breakdown of chemical compounds in coffee beans that can make your coffee lose its aroma and flavor. It’s often found that coffee exposed to too much light is bitter and has overpowering metallic or rancid notes. Thus, preferably, coffee grounds must be stored in a place away from direct light in an opaque airtight container. 3. HeatHeat is another major factor that affects the quality of roasted coffee beans over time. It’s crucial to keep roasted coffee grounds away from heat as much as possible. Heat exposure can make the coffee grounds lose flavor and strip away a lot of oxygen and result in a cup of bitter-tasting coffee. The ideal temperature to store coffee grounds to keep the coffee freshness intact is 68 to 77F. Hence, you must avoid warm places like places next to your oven in the kitchen or cabinets that get a lot of sunlight during the day. 4. Over-Exposure to OxygenOxygen instigates the process of oxidation, which makes every perishable food product, including coffee, go bad. Oxidation-induced degradation of coffee beans results in staleness and loss of aroma and flavor. In some cases, it can also give rise to undesirable aroma and flavor when you brew your cup of coffee. The volatile organic compounds in coffee grounds become unstable and the lipids oxidize to peroxide, producing a rancid taste. The solution is to store coffee in vacuum-sealed containers that keep the pressure below atmospheric pressure by removing any air particles in between. Since the rate of oxidation is dependent on pressure, vacuum-sealed containers provide an inert atmosphere that prevents the oxidation of coffee beans. 5. FreshnessIf you usually go out to your local grocery store or supermarket to buy coffee, you’re already setting yourself up for the premature loss of aroma. The coffee in supermarkets could be sitting on the shelves for months, and if they are switching the dates on the label (which is, unfortunately, a common practice), your coffee will taste stale right from day one. Instead, you can head out to your local coffee roaster to get a fresh batch of coffee. If you are not fully convinced of its freshness, you can also ask them to grind you a fresh batch of coffee beans. Can You Freeze Coffee Grounds?Coffee grounds do well when frozen. The dry environment of a freezer is great to store coffee grounds. Frozen coffee beans can remain fresh for a long time if you use the right container for storage. If the container is vacuum-sealed, the coffee grounds can last for up to two years! On the other hand, if you’re storing coffee grounds in a container that is airtight but not vacuum-sealed, they can last for up to six months. The only problem when you’re freezing coffee is that it cannot be taken out often. While freezing coffee grounds is a great long-term solution, they’re not for everyday use. This is because when you take frozen coffee beans out every day for consumption, the fluctuation in temperature will allow moisture to build up in the packet. So, make sure that you store coffee beans in the freezer only when you are planning to leave them in there for a long time. Otherwise, it is best to skip the freezer and store them in a cool, dark place in a container that is airtight and opaque. How to Store Coffee Grounds in a FreezerThe best way to store coffee grounds in your freezer for longer periods of time is in vacuum-sealed containers. Vacuum-sealed containers allow for minimum exposure to oxygen. Also, when whole coffee beans are kept in vacuum-sealed containers, they release carbon dioxide. This carbon dioxide acts as a blanket, protecting the coffee beans from exposure to oxygen. Vacuum-sealed containers and bags have been proven to preserve coffee and keep it fresh for up to nine months. Ground Coffee Vs Coffee Beans: Which One Should You Choose
If you are an ardent fan of coffee, you might be tempted to buy roasted coffee beans instead of ground coffee to ensure you get a fresh cup every day. But is that even a good idea? Let’s find out which is a better option: ground coffee or coffee beans. 1. StorageGround coffee is much easier to store than coffee beans. It will obviously take up less space and will be much more adaptive to different storage containers than coffee beans. 2. Time-SavingSure, coffee prepared directly from freshly ground beans will taste heavenly. But let’s think practically — will you even have the time to grind those beans every morning? If you are looking to squeeze in a quick cup of coffee every morning before work, coffee beans might not be the best idea for you. 3. CostBuying ground coffee is certainly a more convenient option. But again, convenience comes at a cost. If you’re looking for a budget-friendly option, fresh coffee beans will take the cake any day. 4. Easy to BrewAlmost every coffee recipe will require you to use ground coffee instead of coffee beans. After all, ground coffee has a larger surface area, which helps the hot water running through it absorb more flavor than coffee beans and makes it easier to brew.
Bottom LineCan you freeze coffee grounds? The answer is both yes and no. For long-term storage, freezing is a great option, but if you’re planning to use them every day, then maybe not so much. Now that you know the ideal conditions to store coffee grounds for regular consumption and the best way to store a big batch of coffee beans, hopefully, you never have to worry about your coffee going bad ever again. Usually, coffee grounds stored properly can stay fresh for up to two weeks, after which you can take out a new batch. So make sure you buy coffee grounds in small batches so that they stay fresh without losing their flavor! The post Can You Freeze Coffee Grounds? Everything You Need to Know appeared first on Great Coffee Brewers. from https://greatcoffeebrewers.com/can-you-freeze-coffee-grounds/ Adding the right creamer to your daily cup of morning coffee can be the difference between a good cup of coffee or a mediocre one. If you are a fan of coffee creamer, you might wonder how long can creamer sit out. Technically, the answer depends upon the type of creamer you are using. Not all creamers are made from dairy. There are plenty of vegan options with different flavors that make a huge difference in how the creamer behaves when left out. Today, we will discuss how long different types of coffee creamer can last when left out and the factors that influence it, so make sure you read this article until the end. How Long Can Creamer Sit Out of the Fridge?If you are using liquid coffee creamers, it will not keep for more than 2 hours. When left out after this period, it will be vulnerable to bacterial infection, especially if the ambient temperature ranges above 40˚F. This extends to both dairy as well as non-dairy creamers. It doesn’t matter if it’s still in the original container or mixed with your tea or cappuccino – it’ll undoubtedly go bad after 2 hours. On the other hand, powdered coffee creamers are more long-lasting. Even without refrigeration, they can last for at least 18 to 24 months. What makes them resistant to early bacterial decay is the lack of moisture in their composition. 3 Storage Hacks to Extend the Life of Your Creamer
Like every other organic item, creamers too come with an expiration date. But that does not mean we cannot extend their life with adequate storage precautions. Here are three easy storage hacks to keep your creamers fresh and safe for a longer time: 1. Keep the Temperature LowThe best way to preserve your coffee creamer is by properly refrigerating them, preferably under 40˚F. Under such low temperatures, it will be tough for any type of bacteria or yeast (the microbes responsible for spoiling your creamer) to attack it. 2. Store in Air-tight BottlesEven the slightest hint of moisture can act as a catalyst in ruining your coffee creamer. So make sure you store it in airtight bottles that keep away environmental moisture as well as other contaminants. In fact, it is best to leave your creamers in their original container. The brands have a much better idea of what they are dealing with and will design their packaging to withstand the test of time. 3. Keep Away From SunIf you know it’s important to refrigerate your coffee creamer, you might already be aware that you should also keep it away from direct sunlight. A lot of dairy products contain a compound called riboflavin which is extremely photosensitive. Direct exposure to sunlight will cause it to oxidize and add a bitter or sour taste to the creamer. How Long Can Creamer Last in a Refrigerator?The shelf life for coffee creamer in the refrigerator can range from a few days to 2 weeks. For example, if you are using liquid coffee creamers, it can remain usable for up to a week with refrigeration. Non-dairy creamers can last for more than 2 weeks. Creamers made from coconut milk, almond milk, or cashew will keep for up to 10 days, whereas oat milk creamers can last a week, maximum. Does Every Coffee Creamer Need to Be Refrigerated?
If you do not want to go through the hassle of refrigerating your creamer again and again, we have some good news for you. Certain creamers do not require refrigeration at any stage. These creamers are usually available in concentrate or powder form. Even in the supermarket, you will see them displayed without refrigeration, which means they are prepared to have a stable shelf life even at room temperature. The shelf life of these creamers can range from anywhere between 10 months to a couple of years. If you want to get the most out of them, it’s best to read the labels for storage instructions. Frequently Asked Questions1. Do creamers need to be refrigerated all the time? It depends on the type of creamer you are using. Some need to be refrigerated all the time, while some require refrigeration only once the seal is broken. It’s best to follow the guidelines mentioned by the brand. Alternatively, you can also ask your local supermarket for storage instructions. 2. How can you make your creamer last longer? The only way to make a creamer last longer is with proper storage. Keep them refrigerated (preferably under 40˚F) and store them in airtight containers away from the sun. Refrigerators located inside pantries are the best place to give your creamer a longer shelf life. 3. Can you freeze your creamer? If you do not want to carry around a liquid creamer for your coffee all day, you can pour the leftover creamer into an ice tray and let it freeze. Once it’s frozen, you can keep the creamer cubes in a ziplock freezer bag and enjoy a delicious cup of iced coffee whenever you want. 4. Why does a coffee creamer need to be refrigerated? Creamers are often processed under high temperatures and pasteurized in order to kill all the bacteria that might harm the product. So when you open the container, it once again becomes vulnerable to bacteria and yeast. At this stage, refrigeration is the only way to rebuild your creamer’s original resistance that it had during packaging. 5. Do non-dairy creamers require refrigeration? Sealed non-dairy creamers can be stored without refrigeration. But once opened, it’s best to refrigerate it for a longer shelf life. Although they might last a fair amount of time without refrigeration, proper storage has been proven to not only extend their shelf life but also keep them safer for consumption. Bottom LineLeaving out your coffee creamer for an hour might not instantly make it harmful, but it will certainly compromise the original taste. And for long-term storage solutions, follow our simple 3-step storage tips to keep your creamers fresh and delicious for a longer period. For more coffee drinking tips, check out how to froth creamer. The post How Long Can Creamer Sit Out? appeared first on Great Coffee Brewers. from https://greatcoffeebrewers.com/how-long-can-creamer-sit-out/ There are many different ways to prepare coffee, but adding sweet frothy cream on top is one of our absolute favorites. Frothing your coffee not only adds a creamy texture but also makes it sweeter. That said, buying an expensive coffee machine or steam wand isn’t the preferred option for most households. The solution? Froth your creamer without a frother! In this article, we will share six easy ways to froth your creamer at home without a frother, so make sure you read until the end! How to Froth Creamer Without a FrotherHere are the easiest DIY hacks: 1. Shake It UpThere was a time before frothers when people still got their creamers reasonably frothy. So, if you want to do it the traditional way, pour the creamer into a jar and secure the lid tightly. Next, shake the jar until you see a layer of air bubbles and froth forming at the top. PRO TIP: Do not froth a cold creamer. Warm it up a little and wrap the jar in a cloth before shaking it to create foam. 2. Use a WhiskMany frothers come with a coiled whisk that rotates the creamer at high speed to create a layer of froth. So, if you can’t afford a machine at the moment, get a whisk and whisk the creamer to the best of your abilities until you can see the froth forming at the top. This is a much better way to froth your creamer than the jar method, primarily because the layer of froth you’ll get with this method will be much thicker and creamier. 3. Frothing WandThe quality of the froth depends on two things: the temperature of the milk and the speed at which it is stirred. While the temperature can be easily taken care of, your hands alone might not be able to stir the creamer quickly enough. That’s why we recommend using a frothing wand. A frothing wand is like an electric whisk. All you have to do is immerse it into the warm creamer and turn the switch on. It will then create a nice swirling motion and froth your creamer in no time. 4. BlenderUnlike a frothing wand, blenders come with containers that have a set of rotating blades fixed at their base. Blenders are electrically powered, meaning that it will only take a few minutes to froth your milk. One of the most significant advantages of using a blender is that the container comes with a lid. So, you can — and should — close the container when the blender is on to prevent frothy creamer from spilling all over your kitchen countertop. 5. Immersion BlenderAlthough their names are similar, the design and functionality of an immersion blender are starkly different from regular blenders. Immersion blenders require you to immerse the blender in warm milk, turn it on, and let it swivel until the creamer turns frothy. The only problem with immersion blenders is that they are pretty messy. 6. Electric Mixer
Say you don’t have an expensive espresso machine to froth your creamer — you might still have an electric mixer for everyday kitchen needs. Handheld electric mixers come with a set of beaters that swirl and stir your creamer at high speeds until it begins to show signs of frothing. Similar to a frothing wand, an electric mixer will froth your drink better than manual whisking — just make sure you maintain the ideal temperature to get the best results. Cheap Alternatives for Expensive Frothing MachinesNot every frothing machine is as costly as an espresso machine. If you want to buy a frother on a budget, try a pump frother or French press. Both these appliances work on similar principles. First, get a container and a pump attached to the lid. Then pour the creamer into the container, immerse the pump inside it, and vigorously pump the liquid for 10 to 20 seconds. This way, your rich, frothy creamer should be ready in under a minute! 3 Things to Remember While Frothing Your CreamerDid you know your frothing device isn’t the only thing the quality and intensity of the froth depend on? Here are three other things to be aware of: 1. Don’t Overfill the ContainerDon’t pour the creamer to the brim of the container. Creamers and milk are known to expand when frothed. So, to avoid making a mess, leave a couple of inches at the top to accommodate the extra frothy volume. 2. Don’t Overdo ItIt might be hard to believe for latte and iced coffee fans, but over-frothing is not a myth. Have you ever taken a sip from a delicious coffee with a rich milk foam head? Although the texture and mouthfeel of the froth are great, you don’t want it to take away from the flavor of the coffee. At the same time, frothing makes your creamer sweet, even if it’s a non-dairy, meaning overdoing it will sharply increase the sweetness of your coffee. 3. Not Regulating the TemperatureWhatever device or technique you use to froth your liquid creamer, it should always be done when it’s warm. For best results, try to keep it between 140 and 150 degrees Fahrenheit. NOTE: Cold milk cannot create intense froth, whereas scalding hot milk can burn you. Bottom LineCreamy and frothy beverages are the perfect solution to brighten dull mornings. Whether it’s regular milk, almond milk, coconut milk, or any other non-dairy milk, our above-mentioned tips on how to froth creamer without a frother will work for all. While it’s true that a French press and other dedicated frothing appliances do an impeccable job, our DIY methods are equally adept and will be a lifesaver for those without a frother. The post How to Froth Creamer Without a Frother – Six Different Ways appeared first on Great Coffee Brewers. from https://greatcoffeebrewers.com/how-to-froth-creamer-without-a-frother/ In your haste to discover your favorite coffee beans and brewing method, you may have overlooked one crucial aspect: filters. Filters don’t receive much credit, but they’re essential to the coffee brewing process. Unfortunately, paper filters are substantially more expensive than permanent filters, producing more waste. If you’re seeking to save money while also reducing your environmental footprint, you might be wondering: can you reuse coffee filters? In this article, we’ll show you how to make the most of your coffee filters, so read until the end. Can You Reuse Coffee Filters?Did you know that your coffee filter is not just meant for a single cup of coffee? This might come as a surprise for those who brew a big pot of coffee and only sip a cup or two. However, if you prepare enough coffee, say several cups, you probably know that using new filters for every new cup of coffee isn’t cost-effective. Indeed, most paper filters are designed for single-use, but there are a few exceptions. You can use some of them three to four times before losing effectiveness. The trick is to allow the filters to dry before using them, which can take up to 24 hours. To reuse your coffee filter:
Are you wondering how a filter would look and behave after successive brews?
Reusable Coffee FiltersPaper coffee filters are difficult to reuse since the filter may tear or holes may enlarge throughout the rinsing process. So, you can use one of the many reusable coffee filters on the market, designed for permanent or multiple uses. The list includes: Metal FiltersMetal filters are made of aluminum or stainless steel with perforations. Metal-filtered coffee is strong, flavorful, and aromatic. Moreover, these filters are less absorbent and enable some micro grinds or oils to pass, making your coffee thicker in consistency. Since metal filters are completely reusable, you must clean them between applications. Fortunately, they’re simple to clean, especially if you choose stainless steel. Furthermore, metal filters are incredibly eco-friendly.
Cloth FiltersCloth coffee filters are typically made of natural fabrics, such as muslin or cotton. You may drop them into the filter basket, where the increased size of the fabric weave openings allows more coffee grounds to flow through the paper. Cloth coffee filters are excellent for making medium-flavored coffee, but they are difficult to keep clean. However, the best part is that you can reuse them for several months. Nylon FiltersSome coffee filters use fine nylon mesh affixed to a plastic basket. They have similar filtration properties to metal filters and come in flat-bottomed and cone versions. Although nylon coffee filters are less expensive than metal filters, they are less durable. They will, however, survive a long time if you are diligent with cleaning and handling. How to Clean Coffee FiltersCleaning is essential if you want to maintain the longevity of your coffee filters and not compromise the quality of your coffee. It’s preferable you spend some time cleaning to increase the coffee’s flavor. Here’s how to clean coffee filters: Reusable Coffee FiltersYou need to clean paper coffee filters with the utmost care. Remove the coffee grounds and thoroughly rinse the coffee filter in hot water to remove oils. Next, dry the coffee filter until you’re ready to use it for your next brew. Washing the coffee filter with soap can cause the soap’s flavor to absorb into the filter and ruin your next cup of coffee. Permanent Coffee FiltersConsider rinsing your coffee filter with dish soap and water if it has light stains or grime. If you’ve left things for an extended period and rinsing with dish soap hasn’t worked, it’s time to try something a little more extreme. Make a 1:2 combination of distilled water and white vinegar. Soak your permanent coffee filter for 12 hours or overnight. Brush the filter and then rinse it with warm water. If soaking isn’t an option, scrub the filter with baking soda and a brush. FAQsDo Paper Coffee Filters Have an Expiration Date?In most cases, a paper filter does not deteriorate. Still, it has an expiration date, so you must keep paper filters in a secure, well-protected area. Is It Necessary to Replace the Coffee Filter Regularly?No, you do not need to change the filter regularly. Many individuals reuse paper filters multiple times before changing them to save money and avoid having excess sediment in their cups. What Is the Lifespan of Cotton Coffee Filters?Cotton coffee filters last for around 100-120 uses or 2-4 months for regular coffee drinkers and about a year for occasional coffee drinkers. Regular cleaning and storing your cotton filter will improve the taste and increase its shelf life. EndnoteCan you reuse coffee filters? Most coffee filters, including paper filters, can be reused several times before they lose their effectiveness. Over time, reusing coffee filters can save you a lot of money. This may be the most compelling reason to reuse coffee filters, not to mention that you can even use the filters for crafts, arts, and DIY projects. So, we hope we’ve given you some dilemma regarding tossing a coffee filter in the trash after your daily coffee ritual. Related: How to change a water filter in a Keurig 2.0 The post Can You Reuse Coffee Filters: Money-Saving Tips appeared first on Great Coffee Brewers. from https://greatcoffeebrewers.com/can-you-reuse-coffee-filters/ The morning’s first cup of fresh coffee holds a special place in our hearts. After all, it’s our exclusive “me time” before the day’s mundaneness takes over. One debate that almost always resurfaces when we talk about coffee is instant coffee vs ground coffee. There’s no right or wrong answer to this, as both coffee types are popular for good reasons. That said, some key differences between the two can be absolute game-changers as far as the right coffee for you is concerned, so read this article until the end. What is Instant Coffee?Most people, when they want a quick cup of coffee, reach out for instant coffee. It’s made from whole coffee beans that are first well-roasted, then grounded, and finally brewed. Next, the water from the brewed composition is removed, leaving behind dry coffee crystals. When you add water again to this dehydrated coffee powder, you get a nice, warm cup of coffee. Since making this coffee only involves adding water, it’s called instant or soluble coffee. What is Ground Coffee?Ground coffee is the most common type of coffee in the USA. It’s made of coffee beans ground into smaller particles. This is done to extract as much flavor from the beans as possible and is performed using different tools such as a grinder, food processor, blender, etc. Once the grinding process is complete, these are packaged and then sold as ground coffee. The more this coffee is grounded, the finer the coffee particles get. There are various types of coffee grades available, including:
What is the Difference Between Instant and Ground Coffee?Here are four primary criteria based on which we can draw a fairly accurate comparison between instant and ground coffee: TasteIf the taste is a concern for you, as is for a lot of people, go for ground coffee. Instant coffee is made up of low-quality Robusta beans. They’re the cheapest coffee beans used to bring about a high caffeine flavor, so they taste inferior to ground coffee made from Arabica beans. When the premix of instant coffee is made, the already brewed coffee is further processed and dehydrated, causing the coffee to lose its flavor and become bitter. Since ground coffee isn’t dehydrated, the classic coffee flavor remains intact, so it will taste better than instant coffee. ConvenienceUsing ground coffee can be cumbersome because it doesn’t dissolve in water. Instead, it needs to be soaked in it, but then it’ll start leaving its flavor in the water. Once this is done, the coffee grounds will have to be separated from water, followed by a thorough cleaning of the machine. Next, the caffeinated solution will have to be mixed with milk and sugar – and then you will have your coffee ready.
That sounds like too much work, doesn’t it? With instant coffee, all you need to do is add hot water to the premix, sit back and enjoy the drink. Instant coffee is extremely convenient to make and the go-to for many people, especially someone who needs a cup on the go. PriceRobusta coffee beans that are used to make instant coffee have high caffeine content. Plus, they grow in abundance since their plantations are resistant to diseases and pests. On the other hand, Arabica beans that are used to make ground coffee are prone to pest attacks, which is why their production is about 50% less than Robusta beans. This is a prominent reason why instant coffee (made from Robusta beans) is cheaper than ground coffee (made from Arabica beans). But if you’re one of those coffee enthusiasts for whom price isn’t a deciding factor and you’re looking for the highest quality taste, you must go for ground coffee — for the reasons we’ve mentioned in the first point. Dissolving in LiquidsNo matter how finely you grind the coffee, it will not dissolve in water. Instead, you’ll have to soak it in water to extract its flavor and then add it to milk. Instant coffee has the exact opposite mechanism as far as dissolving in liquids is concerned. When you add instant coffee to hot water, it will dissolve in no time. FAQsHow Long Does Ground Coffee Remain Usable?Ground coffee starts to release its flavor quite quickly, but it will remain drinkable for many years. The only way ground coffee goes bad is when it is contaminated with water or any other liquid since this will lead to bacterial growth. You must always store ground coffee in a dry place. Can I Freeze Fresh Ground Coffee to Lengthen Its Life Span?Freezing ground coffee would mean introducing moisture into it, which will cause the growth of fungal bacteria. You should remove the coffee beans from the original packet because they may not be airtight. Next, transfer it to an airtight container and store it in a safe, dry place. Can Instant Coffee Go Bad?Instant coffee has a much longer shelf life than ground coffee. But it can still go bad and develop a mold if it is not stored properly. It’s also best to adhere to the expiry date mentioned on the packet. What Can You Do with Expired Instant Coffee?Do not consume or use instant coffee if it has expired. Use it for your garden as a fertilizer. Which Coffee Has the Highest Caffeine Content?Robusta coffee beans have the highest caffeine content, whereas Arabica beans have around half the caffeine as Robusta beans. The type of coffee bean and the brewing method used also dictate the caffeine proportion in coffee. ConclusionWe hope this article has settled the debate of instant coffee vs ground coffee for you. Simply put, instant coffee would serve well if price, ease of making, and overall convenience are top concerns for you. But if you need a lip-smacking coffee that’s way ahead of its peers in terms of taste and aroma, go for ground coffee. The post Difference Between Instant And Ground Coffee: A Detailed Comparison appeared first on Great Coffee Brewers. from https://greatcoffeebrewers.com/difference-between-instant-and-ground-coffee/ So you’ve had your fair number of cappuccinos and flat whites but aren’t sure how they vary. While the most fundamental distinction is the milk, the two drinks also have different origins. In this article, we’ll compare flat white vs cappuccino, looking at their history as well as their significant similarities and differences to help you decide which type of coffee is ideal for you. What Is a Flat White?In most cafes and coffee shops, a flat white is a small latte with less milk. The flat white is an espresso-based drink with 1-2 espresso and microfoam milk shots, with no dry foam on top. It’s a blend of frothed foam and steamed milk – the foam is usually silky with few bubbles. The drink’s name comes from the unique thin layer of microfoam on top. There are two ways to serve flat whites: with little to no milk foam or with a lot of it. The flat white is a fantastic choice for coffee drinkers who like a more robust espresso flavor. While the milk in a flat white contributes to or improves the drink’s taste, the espresso still shines in the mouth. Microfoam is the key to the flat white process. It’s heated milk with enough aeration to generate thick, tiny bubbles. This microfoam is first poured carefully over the espresso until it hits the last inch or so of the cup. History of the Flat WhiteIt’s impossible to pinpoint exactly where the flat white came from, but it made its way to New Zealand and Australia in the 1980s. The Third Wave Coffee movement increased the prominence of the coffee craft during this period, and milk drinks were enhanced with the help of expert pouring skills. Since then, Latte Art has embellished the Flat White with hearts, flowers, leaves, and swans. It became more common on drink menus in the United States, the United Kingdom, and other countries decades later and is now a specialty cafe standard. When Starbucks began providing flat whites as a “bold” alternative to its latte macchiato in the United States, it was clear that the coffee had gone mainstream. Flat White RecipeHere’s how you make flat white:
The end product should be lighter than a latte due to the micro-foamed milk and it allows the espresso notes to fully develop. What Is a Cappuccino?A cappuccino is a blend of heated milk, espresso, and foam. The structure of this coffee is pretty simple – all you have to do is segment all the elements into equal thirds. An excellent cappuccino should be creamy but not acidic, with a hint of sweetness from the milk. The sheer variety of cappuccinos is mind-boggling. There’s a dry and wet cappuccino, bone dry, a highly wet cappuccino, and not to mention the standard recipe. Many people prefer one because of the variety of sizes and ingredients.
History of the CappuccinoThe origins of cappuccino are fascinating. The drink’s name comes from the brown hue of the drink, which is similar to the color of the Capuchin friars’ clothes. When you add milk in small increments to the darker espresso, you’ll see a lighter brown color developing, resulting in a pleasant level of crema. In the 1700s, another name for cappuccino was “Kapuziner,” invented by the people of Vienna. This cappuccino was made of whipped cream and spices. However, in the 1930s, this tasty drink made its way outside Italy. It steadily rose in popularity after its introduction into Austrian cafes. Cappuccino Recipe
Flat White vs CappuccinoThe flat white and the cappuccino are espresso-based coffees with 1 to 2 shots. They’re made of milk, but you can use oat, soy, almond, or other dairy-free alternatives. The similarities end here, and now we’ll dive into the differences between flat white vs cappuccino:
Which One Do You Prefer?To conclude the flat white vs cappuccino debate, the main difference between a flat white and a cappuccino is their preparation method and the amount of milk used. That said, you only need a coffee grinder, an espresso machine, plus some expertise pulling shots and steaming milk to get started with either of them. Your personal preferences will have a massive say on whether you’ll be a flat white or cappuccino lover. Having learned the difference between a cappuccino and a flat white, we think you’ll probably order a flat white if you want a stronger espresso taste and a cappuccino if you prefer a foamier, milkier beverage. You might like this: Cappuccino, Espresso or Latte, which One is Your Favorite Mr Coffee Cafe Barista Espresso and Cappuccino Maker Review The post Flat White vs Cappuccino – What’s the Difference? appeared first on Great Coffee Brewers. from https://greatcoffeebrewers.com/flat-white-vs-cappuccino/ |
ABOUT USOur website provides insightful reviews with explanations of every feature of a coffee machine so that you can take a look at their features and pros & cons to have a better understanding about it. Actual customers reviews were also well detailed. ArchivesNo Archives Categories |


 RSS Feed
